
How to Grow and Care For Irises
By Linda Lee
When to plant: fall for most rhizomes and bulbs; if transplanting Japanese live roots and fans, any time.
What Iris means: In Greek, Iris is the goddess of the rainbow; the French, starting with Henry VI, adopted the Iris as a heraldic symbol, the fleur-de-lis.
When they bloom: most bloom in the spring. Some bloom in June. Japanese iris bloom early summer to midsummer.
Recommended: Inhale! The 10 Most Fragrant Flowers for a Blissfully Scented Garden
Where to plant: Sun or part shade; iris rhizomes and bulbs in general want slightly acid dry ground; Japanese iris like wet feet; Siberian iris like moderate moisture. Zones 3 to 9.
Special information: Iris parts have names – the three large outer petals are called “falls,” the three upright petals are called “standards”
The Many Different Plants We Call Irises
The big bearded iris (from a rhizome, often called German iris), a bulbous iris (correctly speaking, the Spanish or Dutch Iris), the English iris, which was found in the Pyrenees; the lovely and slender Siberian iris, and the Japanese iris, which looks like, but has different demands from, the Siberian Iris. There are also two we won’t deal with: an invasive yellow iris called a flag iris (also sold as iris pseudacorus) and a pond iris called iris laevigata.
Recommended: How to Grow and Care for Lisianthus Plants
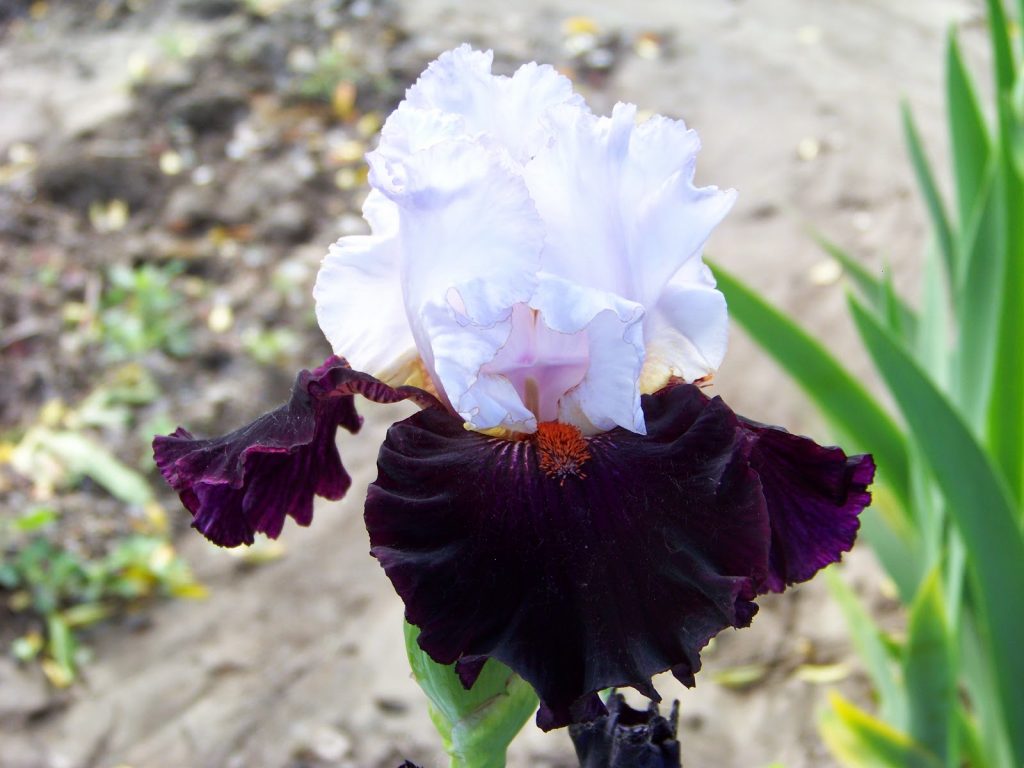
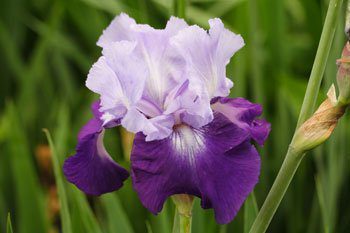
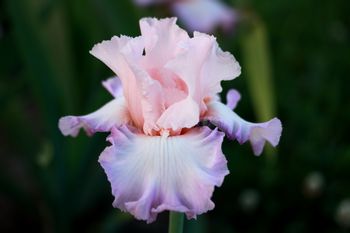
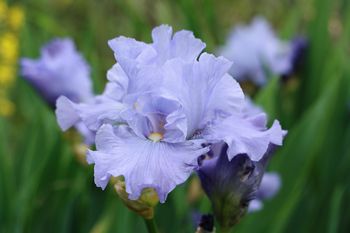
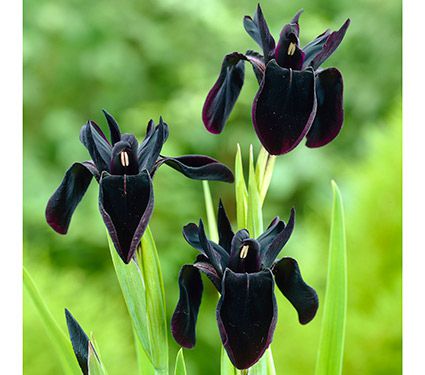
Let’s start with the bearded iris (iris germanica), the one seen standing in clumps in front yards, lavender, yellow, white, bicolor in April and May. It is grown from a rhizome, and is a mostly carefree garden staple, except for the dreaded iris borer caterpillar.
Our bearded iris How To’s come from Rainbow farms, which grows 250 acres of irises in Bedford, Iowa.
Planting Bearded Iris, Standard Front Yard Flower
When to plant – The best time to plant iris is late summer through early fall. We recommend planting from mid-July until mid-October depending on your location. Those in southern climates can usually push the deadlines and plant into November. Spring planting is discouraged but can be done under abnormal circumstances. Spring planting can often result in lack of bloom for a season or two and slow establishment.
Recommended: Tan Hua Flower Becomes a Star Thanks to “Crazy Rich Asians”
Where to plant – for best growth and bloom, iris need at least half a day of full sun. We’ve had success with plants receiving morning sun until 2:00 pm, then afternoon high shade. On the farm our irises receive 100 percent sun. Older, historic cultivars have been observed to tolerate more shade than some of the newer cultivars.
Soil conditions – Bearded iris need a balanced, well-drained soil but are very adaptable to a variety of soil types. Raised beds can help with drainage and are a MUST for areas with high rainfall. Iris, like most perennials, prefer neutral to slightly acidic soil (pH of 6.8 to 7.0 is ideal). Heavy clays need to be amended with gypsum or coarse sand to aid drainage. In our production fields, we till the soil to a depth of 10 to 12 inches and add a dash of superphosphate or bone meal. Iris can be mulched lightly (for winter protection and weed control) as long as the mulch does not cover the rhizome. Once winter is over, it is wise to remove the mulch.
Recommended: Jill Kargman Survives Quarantine with Black Flowers, Art and Humor
How to plant – The most common mistake made with bearded iris is planting too deeply. First make a 3-inch deep depression about 6 inches in diameter. In the center make a small, fist-sized mound of soil. The rhizome is placed on top of the mound so that 1/3 of the rhizome will be above the soil. Spread the roots out to support the plant, replace the soil, firmly packed around the roots to remove air pockets and water liberally.
DO NOT plant bearded iris in a low area; they will not tolerate standing water. We suggest 14 to 18 inches as a good distance between rhizomes. This allows the new growth to fill the area between plants in about three to four years. For mass or clump style plantings, plant rhizomes in a triangular fashion about 6 inches apart. Planting in this way will require division more often than other methods. In areas of intense summer heat, irises can be planted deeper (no more than 1 inch below the soils surface) to avoid scalding.
This rule also applies to areas with light soils.
Fertilization – Modern iris varieties may need more fertilizer than older varieties, due to the increased number and size of blossoms. We fertilize in mid-to-late April with bone meal, superphosphate, or a fertilizer low in nitrogen such as 6-10-10. Fertilizers high in nitrogen tend to cause bacterial rot and lush-but-weak foliage growth. When selecting fertilizers for irises, be sure that the 2nd and 3rd numbers are bigger than the 1st.
These numbers stand for the amounts of phosphorus and potassium in the mixture. Phosphorus and potassium are the key nutrients in root and bloom production. Another dose of fertilizer at half strength after fall dividing and planting will slow release throughout the winter and early spring. Though fertilizing can only help, it is certainly not necessary for growing a garden of beautiful irises.
General care – Over time, iris clumps will become crowded and bloom will suffer. In late summer simply lift the entire clump with a garden fork. Cut apart the newer, younger “babies” from the older center rhizome, and replant as before. The center rhizome, although the largest, will not bloom a second time, so send it to the compost pile. Sometimes you will see new buds coming off the center rhizome. In that case you can replant as before. Irises do not like competition from weeds. Keep your beds neat and clean to allow the sun and air to keep the rhizome dry and happy.
Recommended: 7 Tips for the New Veggie Gardener
The iris borer life cycle begins with eggs laid by the borer moth in leaf litter at the base of the plant. Cleanup will keep those eggs from hatching and sending little borers into the rhizomes. Rarely will the borers kill the iris, but they will make them less productive.
Remember that bearded iris are drought tolerant! Watering is necessary only under the most severe droughts. Avoid watering otherwise.
Finally, enjoy your iris. They will produce dramatic, beautiful blooms with minimal care and outstanding blooms with just a little more.
Next The Dutch Iris, Grown From A Bulb
What is called the Dutch Iris, a slender flower with slender leavers, was originally cultivated in Spain.
Dutch iris (iris hollandica) have orchid-like flowers with silky petals and bloom later than bearded iris. Flower colors range from pale blue and lemon through deep purple, bronze, rose and gold. Dutch iris are popular with floral designers because they are dramatic, long-lasting and easy to arrange in a vase.
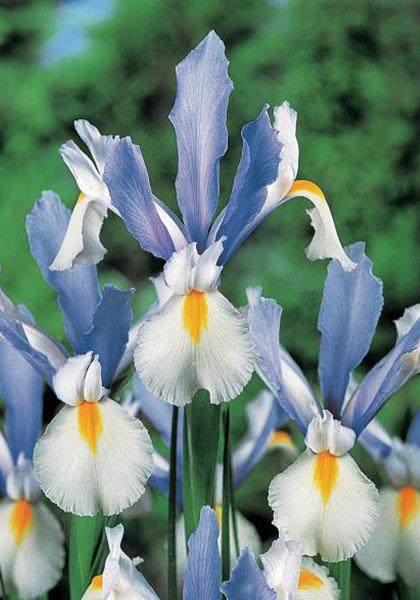
Unlike other types of iris that grow from thickened roots called rhizomes, Dutch iris grow from teardrop-shaped bulbs that are planted in fall.
When to plant: For best results, plant the Dutch iris bulbs in the fall, within a month after receiving them.
How to Plant: Dig a 6” deep hole and incorporate peat moss or compost to help improve drainage. Plant the bulbs with the pointy end up, approximately 5” deep and 4” apart. Like most bulbs, Dutch iris look best when they are planted in large groups. For an impressive show, plant about a dozen bulbs per square foot. When growing conditions are ideal, Dutch iris will come back to bloom a second year. In practice, most gardeners treat these bulbs as annuals and plant fresh bulbs each fall.
In warm climates, the bulbs may begin to produce foliage in late fall and early winter. Flowers will follow in spring. In colder areas you will not see any foliage until spring. Feel free to cut the flowers for bouquets. This will not harm the bulbs.
Recommended: 9 Great Outdoor Activities to Do with the Family or Solo
To get a second season of blooms, remove the spent iris flowers, leaving behind as much of the stem and foliage as possible. Allow the remaining foliage to continue growing until it withers and yellows. During the summer months, while the bulbs are dormant, the soil should be kept quite dry.
In areas with wet summers, you can dig up your Dutch iris bulbs after the leaves have yellowed. Store the dry bulbs in a dark, cool place and replant them the next fall.
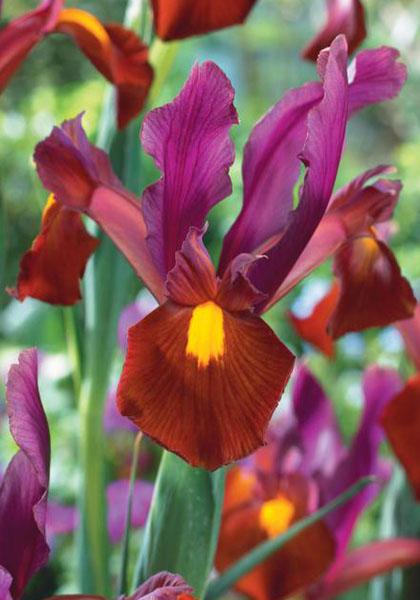
The English Iris – Another Iris Grown from Bulbs
This iris comes from the Pyrenees, in other words northern Spain, thus it’s not a surprise that, like the Dutch/Spanish iris, it too grows from a bulb.
In many ways the English Iris, also known as I. xiphiodes and I. anglica, is a classic iris: often dark blue with yellow marks.
With rather stiff swordlike leaves, it can be naturalized in meadows. As might be expected with an iris with so many names, its bloodlines are a little mixed.
An advantage over the bearded iris, the English iris blooms later in the year, flowering in June and July. BlomsBulbs sells a mixture of what it called English iris (iris latifolia) bulbs that includes purple, white, blue and speckled iris. It says that, once planted, these iris should never be moved.
Recommended: Minnesota to Pay Residents $500 to Grow Bee-Friendly Flowers
As near as can be established, in time of blooming, the sequence would be:
Bearded iris and Siberian iris, then Dutch/Spanish iris, then English iris, followed by the latest craze, the Japanese iris and the pond irises (not covered).
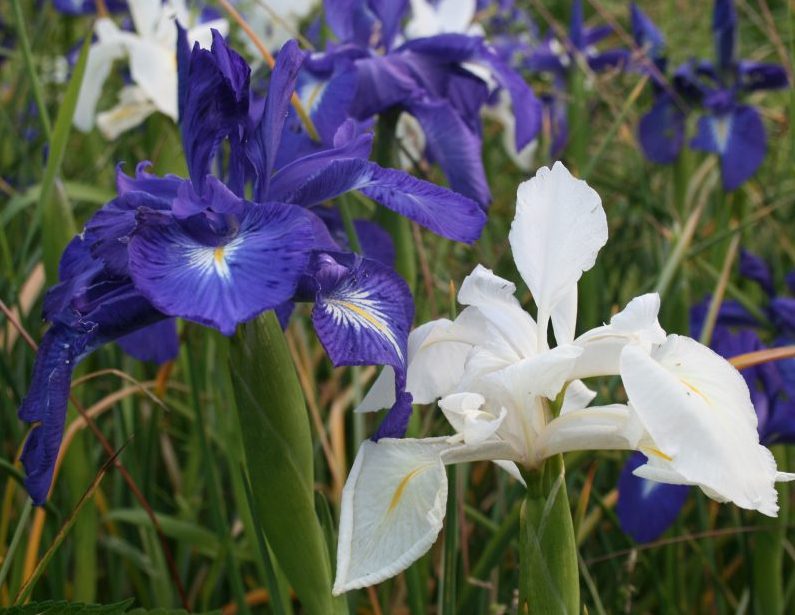
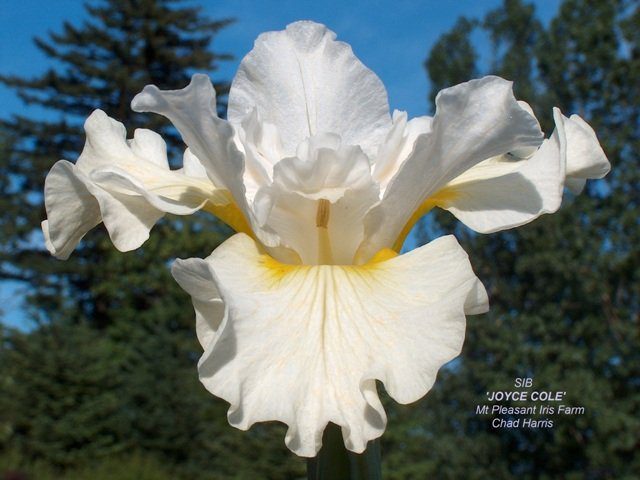
The Siberian Iris – An Easy Iris That Grows From A Rhizome
These instructions from Mount Pleasant Iris farm, near Portland, Oregon.
Planting: Newly received bare root plants should be soaked in cool water for a few hours or overnight. Plant 2 inches deep in a prepared bed, 18 to 24 inches apart. Water in well and keep moist until fall rains take over. They can be transplanted almost anytime when the temperatures are below 90 F and above 32 F for a month afterwards.
Soil: Siberian iris prefer lose garden soil enriched with organic compost. Ph should be slightly acidic, but Siberian iris will survive in slightly alkaline soils too.
Water: Once established, they are very drought tolerant but would prefer a deep soaking every so often. Constant moisture in warm humid areas will encourage crown rot.
Light: Full sun with a minimum of 6 hours to bloom properly. Afternoon shade in hot areas will benefit bloom.
Mulching: A mulch of 2 to 4 inches is recommended. This will keep the soil cool, retain moisture and suppress weeds.
Fertilizer: Siberians are moderate to light feeders. A light application of a well-balanced fertilizer once a year right after bloom is beneficial. After a light frost, remove old foliage with a serrated knife and destroy.
Pests: Slugs and snails can be a problem. Either pick them off by hand or use slug bait if damage is seen. Thrips and iris borer can be controlled with a systemic insecticide. We recommend Orthene, or Cygon 2E; follow manufactures instruction.
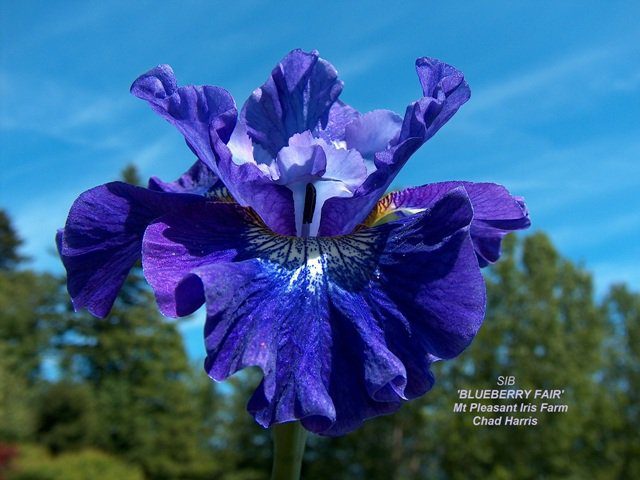
Siberian iris remain one of the easier iris plants to grow; some beds continue blooming for decades without any division or insecticide, making a large sweep of blue, lavender, white or one of the new multicolors. Because Siberian are “bridge” bloomers, including early and late, we have included some of each in our selections. Nonetheless, they tend to bloom around the same time as bearded iris, not as late as the bulb irises.
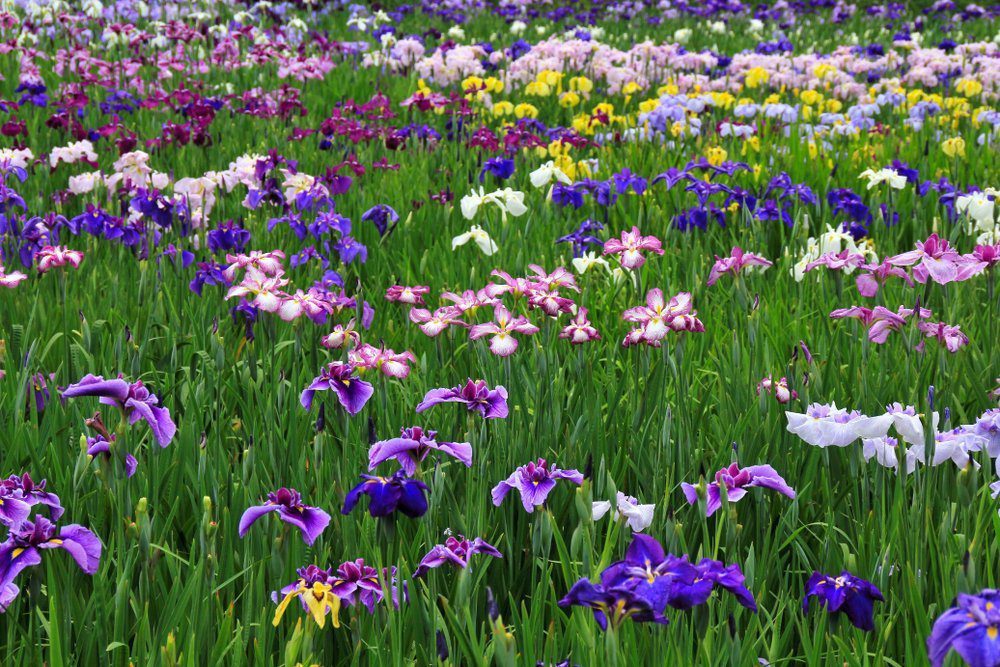
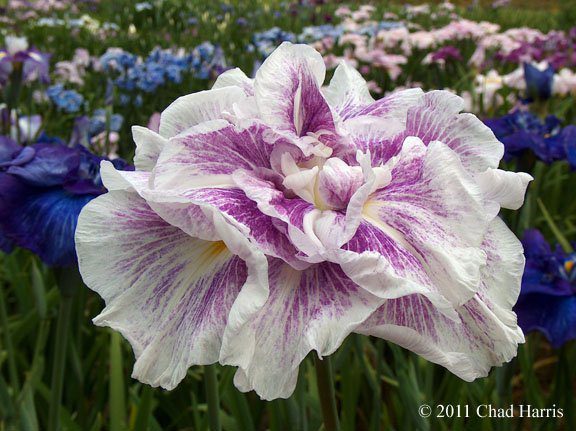
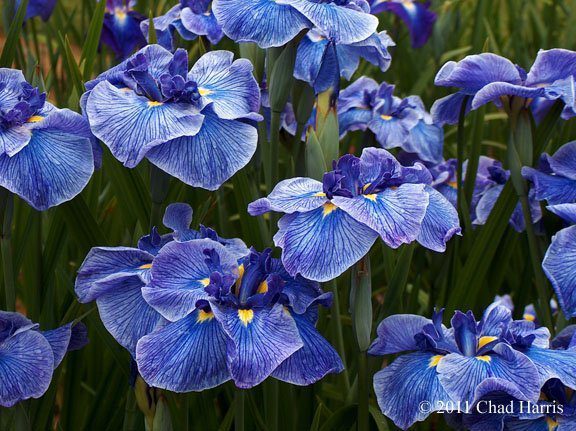
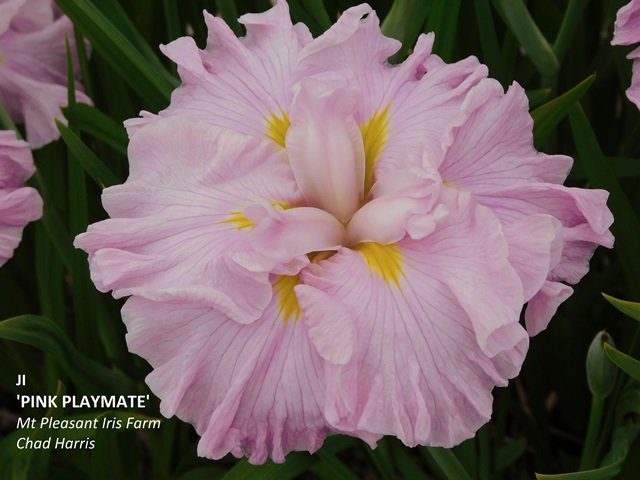
Japanese Iris – Late-Blooming Iris for a Pond Area
The following information is again from Mount Pleasant Iris, in Oregon, a specialist in irises.
Perhaps no other iris is as influenced by good culture as Japanese iris. Demanding in their needs but if met they will reward you with tall robust plants and larger blooms. Hardy in zones 4-9.
Planting: Newly received plants that are bare root should be soaked in cool water for a few hours or overnight. Plant individual rhizomes 2-3 inches deep, 6- to 8-inches apart. Give a good 18- to-24 inch spacing between different named rhizomes. Water in well to start the root development, do not let new transplant dry out. Depending on your soils and weather a daily watering may be needed for the first week or two. Planting in a shallow depression will allow you to flood irrigate the plants. New transplants may not bloom the first year. Expect your best bloom on 2- and 3-year-old plants.
Caution: Do not use bone meal. This has the same effect as lime and can kill Japanese irises. Also, do not fertilize newly planted (or transplanted) Japanese iris as this can burn the roots.
Soil requirements: Japanese irises prefer a rich, loose soil with ample organic matter. An addition of well-aged manure and compost will help in water retention as well as adding nutrients. The soil PH should be slightly acid, ideally between 5.5 to 6.5.
Water: Japanese irises do not like to dry out. Constant moisture will reward you with healthy plants and larger blooms. Wet in the spring and keep moist all summer. They do very well near water (this is where they naturally grow) or where the water table is high. The crown of the plant needs to be above the water line.
Light: Full sun with a minimum of 6 hours to bloom properly. Afternoon shade in hot areas will benefit bloom.
Fertilizer: Japanese iris are heavy feeders. Depending on your soil a liberal application of balanced fertilizer for acid loving plants (Rhododendron, Camellia) in the spring just before or after bloom is beneficial. Most soils with heavy watering will usually need more nitrogen (Ammonium sulfate) applied. Do not apply fertilizers to new transplants.
Mulching: A mulch of 2 to 4 inches is recommended. This will keep the soil cool, retain moisture, and suppress weeds.
Special note: New roots form above the old roots each year forcing the crown up and out of the soil. It is critical to transplant every 3 to 4 years.
Winter Dormancy: Remove and destroy old foliage with a serrated knife after a light frost, cutting the plants to the ground.
Pests: Slugs and snails; bait if damage is seen. Thrips and iris borer can be controlled with a systemic insecticide (i.e.: Merit or Orthene) following manufacturers’ instructions.